Showing posts with label tutorial. Show all posts

Sunday, February 28, 2010

BloggerTube - The first Blogger video template!


Since from the very beginning of this blog, I had in mind that most of people do not use Blogger just because of its "limitations", or whatever they think blogger has, so I have decided to creat unique templates that would blow people's minds not only because of their designs, but also for its many unique and out-of-the-box features.

Now I bring you a template that no one has never made for Blogger: a video template. Yes, now you guys can showcase your videos using blogger! ins't that awesome?

The fact is that I am very excited about this template, because this one may turn out in a revolution on Blogger templates, People will now see that Blogger is not as limited as they thought it was, believe me: I didn't even start describing its features yet.

I have been working on this template for the past weeks, finding a way to improve it each time I put my hands on it. The best thing was the help I have got from my gift-minded friends Abu Farhan and Aneesh (from Bloggerplugins.org). They are (seriously) the best and fastest Blogger developers that I have ever known, I am very lucky to get to work with this guys.

Now let me present you BloggerTube: A video template that creates a perfect link between Blogger (The best blogging tool in my opinion) and Youtube (The biggest and most used online video service on the internet).

There are many reasons for my excitement, but I can summarize them in two simple ones:
#1 - This template is totally automatic, anyone can use it, and even the most newbie guys will be able to post videos on it.
#2 - It is the first of its kind, So this will motivate me to release new version and implement new features each version.

Check out the live demo and you'll what I am talking about!


BloggerTube Instructions:

Note: A really nice user from our community (Thanks Mesothelioma) has just made this great collection of video tutorials for Bloggertuts, Please check it out, specially beginners. Make sure you watch them before asking for help!

How to post a new video on BloggerTuts


1 - You'll only need 2 things: A post sample (Please download it here and save it as post sample under your Blogger settings) and a video URL from youtube.


2 - Go to Youtube.com and grab a video URL:


3 - Now head to your Blogger dashboard and create a new post, It will open up the posting page with your previously saved post sample:


4 - Note that you have 2 important elements:

- "endofvid" - Will be used to tell the template that your video URL has finished, you should paste your URL right before it, with no spaces!

- [starttext] and [endtext] - Those are your post content wrapper, so if you need to write anything, post any picture on your post, please do it inside these two lines. This is an important step, if you write anything out of these two lines, it
will not be shown on your post.


5 - Here's how the your post should looks like:


I have highlighted the important elements just for your reference, but you should not do that on your posts.

How to install the "Recent Videos" widget"


sorry can not post html code there is a problem with this new blog will be improved you can download it here


Automatic features on BloggerTube:

Once you have made your post, BloggerTube has taken care of it, let's check it out the awesome automatic features on this neat template:

Automatic video thumbnails on home page:


Automatic embedded video on post page:


This one may be the most cool feature of this template, it is completely mind blowing, and you doesn't even to touch the code to get it, It's already installed and running for you!

BloggerTube Highlights


Custom star ratings from js-kit.com :


Recent videos widget from Bloggerplugins.org (adapted specially for this template):


Exclusive scripts from Abu-farhan.com created specially for this Blogger video template that makes it totally awesome and
intelligent.

Note: if you are experiencing any problems with the page navigations, go to your Edit HTML pade, check Expand Widget models, and replace the following url:

Thursday, February 25, 2010

How to Eliminate Heck on Blogger


Eliminate steps heck:
1. Html script Backup your blog.

2. To remove this hack I use the site attendants who can tell us what in the heck, whatever the script into html disusupkan our blog. Immediately kunjugi site, the What Would Google See? You can type the text in search engines or click the link below wwgs.stots.de

3. Enter your blog URL address in the box that has been available www.fathara.co.cc example, can be www or without www.
Click the Compare with itself.

4. No longer will kemudia out the report. Under the heading Results for: If your blog good condition report will mention, for example, "Google sees 'www.fathara.co.cc' just like your browser does. Everything should be fine ". If it does not report results like this and there is a problem, this site will give details of what parts of your blog that got heck. You copy all the reports from the site and then paste it in notepad.

5. Once you know what the heck part, into the blogger layout or html script of your blog via the dashboard. Then go and look at the Footer section, because this part of the Hecker footer heck put it. In order not to experience or see an error to open early or original script of your blog, such as blogs have had additional modifications.

Then you compare it with the current script. If it looks when comparing no additional new script or html, and you do not feel add, delete scripts.

6. Once removed, make sure you save your changes.

7. After about 24 hours, a test you try again to enter your blog url on What Would Google See? If the results of the written report "Google sees 'yourname.blogspot.com' just like your browser does. Everything should be fine ", meaning the template or the html of your blog is free from heck.

8. If that does not affect our blogs the easiest step is to change our blog template with a new template.

Wednesday, February 24, 2010

Emotion Smiley Code Facebook

If you frequently chat on facebook and like to use the smiley, here are kode2 smileys can be used in Facebook chat.
This would be useful to remember there are many places that make for a chat, and many of them provide a lot of emotion that makes the atmosphere more lively so if you are interested please copy and paste the code below code


happy :-) :) :] =)

robot :|]

curly lips :3

pacman :v

upset >:O >:-O >:o >:-o

confused o.O O.o

squint -_-

kiki ^_^

heart <3

kiss :-* :*

angel O:) O:-)

devil 3:) 3:-)

Shark (^^^)

unsure :/ :-/ :\ :-\

cry :'(

grumpy >:( >:-(

sunglasses 8-| 8| B-| B|

glasses 8-) 8) B-) B)

wink ;-) ;)

gasp :-O :O :-o :o

grin :-D :D =D

tongue :-P :P :-p :p =P

sad :-( :( :[ =(

emotion facebook is you can use immediately to stay in the copy of it, happy blogging

Monday, February 22, 2010

How to download youtube video with keepvid

How to download youtube video for bloggers might be something very easy. Also for some people who have long disunia the Internet might not be that difficult. But for those new to the internet and just met with youtube may be very helpful to post how to download videos from Youtube. We already know for yourself that youtube is a facility the largest online video streaming in the internet universe. This hybrid google web positions in all 4 websites all over the world rankings.

Until there enough introduction, now we enter the initial discussion. How to download youtube vidoe? In fact many, many ways to be downloaded. If I myself use IDM (internet download manager) which will automatically have the option to download the patch when opening video youtube. but sometimes it can not. Therefore, I will provide another way to 100%.

One wore keepvid. How? Please follow the steps that I will give.
1. Open the youtube video you want to download.
2. Then copy its URL link, to the right or in the URL address can.
3. then open keepvid
4. Copy the link was in part provided URKL then click "download"
5. There will be display with the option to download various qualities.
6. Select one and wait for the download it.

Saturday, February 20, 2010

6 Adding Technorati Widgets and Chicklets

A friend wrote in the guestbook (guestbook / shoutbox) of this blog asking how to install chicklet / widgets such as Technorati Favorite on my blog (see above guestbook). I told them to take the code directly on technorati.com, he said no. I recently visited technorati.com fun, it was no longer installed. Or nyelempit times huh? All make tutorial about widgets / chicklet Technorati, following some chicklet code or widgets and examples / screenshotnya can reply you put on your blog.

1. Technorati Favorite useful to visitors starry-dg content of your blog, enter your blog as a favorite blog in Technorati. Copy / paste the following code, do not forget to change my blog URL to your blog:


<a href = "http://technorati.com/faves?add=http://www.fathara.co.cc" mce_href = "http://technorati.com/faves?add=http://www.fathara.co.cc "> <img src =" http://static.technorati.com/pix/fave/tech-fav-1.gif "mce_src =" http://static.technorati.com/pix/fave / tech-fav-1.gif "alt =" Add to Technorati Favorites "/> </ a>


2. Blog Authority
Function: It automatically shows how many blogs link to your blog. Copy / paste the html code / javascript below and put it in the sidebar or footer. Of course, change my blog URL address to your blog's URL.


src="http://widgets.technorati.com/t.js" mce_src="http://widgets.technorati.com/t.js" <script type="text/javascript"> </ script> <a href = "http://technorati.com/blogs/http://kolom-mario.blogspot.com?sub=tr_authority_t_ns" mce_href = "http://technorati.com/blogs/http://www.fathara.co.cc? sub = tr_authority_t_ns "class =" tr_authority_t_js "style =" color: rgb (66, 97, 223); "> View blog authority </ a>


3. Link Count / Blog reactions

Function: To find out how many blogs link to post on our blog. Therefore, the link count for this code is placed in parallel footer dg blog post author, comment and permalink. If you happen to confusion and installing the code "Read More", then put the code below under the code "read more". Here's the code and place it before or after:
The following reply codes must be installed


src="http://embed.technorati.com/linkcount" mce_src="http://embed.technorati.com/linkcount" <script type="text/javascript"> <a class = "tr-linkcount" href = "http://technorati.com/search/% 3C $ BlogItemPermalinkUrl $% 3E" mce_href = "http://technorati.com/search/% 3C $ BlogItemPermalinkUrl $% 3E" view = "" blog = "">


4. Blog Popular Tag Cloud Widget:
Function: To know the tag / label / most popular categories currently in Technorati in the form of cloud. Change the code to my blog URL dg URL / address of your blog.
Code:


src="http://widgets.technorati.com/t.js" mce_src="http://widgets.technorati.com/t.js" <script type="text/javascript"> </ script> <br /> <a href = "http://technorati.com/blogs/http://www.fathara.co.cc?sub=tr_tagcloud_t_ns" mce_href = "http://technorati.com/blogs/http:// column-mario.blogspot.com? sub = tr_tagcloud_t_ns "class =" tr_tagcloud_t_js "style =" color: rgb (66, 97, 223); "> View blog top tags


5. What is Hot Top Search
Function: To find out what the most searched through the search engine Technorati.
Code:


src="http://widgets.technorati.com/t.js" mce_src="http://widgets.technorati.com/t.js" <script type="text/javascript"> </ script> <a href = "http://technorati.com/pop/?sub=tr_top-searches_t_ns" mce_href = "http://technorati.com/pop/?sub=tr_top-searches_t_ns" class = "tr_top-searches_t_js" style = " color: rgb (66, 97, 223); "> Technorati Top Searches </ a>


6. Technorati Top Tags
Function: to know the most used tag on Technorati today. Dg wrote a bit like 4 numbers, if you want to place a pairs better than yg yg number 4.
Code:


src="http://widgets.technorati.com/t.js" mce_src="http://widgets.technorati.com/t.js" <script type="text/javascript"> </ script>
<a href = "http://technorati.com/blogs/http://www.fathara.co.cc?sub=tr_tagcloud_t_ns" mce_href = "http://technorati.com/blogs/http://kolom- mario.blogspot.com? sub = tr_tagcloud_t_ns "class =" tr_tagcloud_t_js "style =" color: # 4261DF "> View blog top tags </ a>


please try happy blogging

How to create a Blog or Web visitors to get faster and faster increase Rank


How to create a Blog or Web visitors to get faster and faster increase Rank.
ago on how to change the blog to be no follow do follow? This is the tutorial is:
1. In the edit html, you must first save the template to its
2. Check on the "Expand Widgets Templates"
3. Cari (CTRL + F) kode: 'data: comment.authorUrl' rel = 'nofollow'
4. remove this code

rel = 'nofollow'


Easy is not it? Well this Blog is

DO FOLLOW < / a>


Congratulations ... to try and hopefully your blog will grow Rank ..

How To Embed YOUTUBE video,movie in your blog

So,you want to embed a video(movie) onto your blog.The process is very simple,even a dummie can do it.If you want to embed your original video,then first sign up for an account in youtube and upload your video and get the embed code.

Otherwise,you can easily embed any public youtube video in your blog.Go to youtube.com and search for the video.For example,if you want to embed a Barack Obhama video,search it and copy the embed code on to a windows notepad or anything else.
The following process is explained below with pictures for easy understanding.

1.Go to youtube.com and search for your required video


2.Copy the embeded code(ctrl+c) and paste(ctrl+v) it in windows notepad.


3.Sign in in to your blogger acoount and click the New Post button and next,select the option 'Edit html' as shown below and paste the html code as shown below.


4.Publish the post.That's it, as you can see now,the youtube video is embeded in your post properly.

5.example


Friday, February 19, 2010

How To Simple Become Blogger Blogroll Nofollow

To day tutorial about How To Simple Become Blogger Blogroll Nofollow. Follow this step :This is very important if you consider about your site SEO.Adding the nofollow attribute to your blogroll, would nullify any link juice with Google.If you like to add Nofollow attribute to your blogspot blogroll simply follow the steps below:
1.Login to your dashboard--> layout- -> Edit HTML
2.Click on "Expand Widget Templates"
3.Scroll down to till you see your Blogroll widget code :
(Note : You may also can find it by searching<b:widget id='BlogList )
Your Blogroll widget code will look like this:


<b:widget id='BlogList1' locked='false' title='Blogroll' type='BlogList'>
<b:includable id='main'>
<!-- only display title if it's non-empty -->
<b:if cond='data:title != &quot;&quot;'>
<div id='blog-list-title'>
<h2 class='title'><data:title/></h2>
</div>
</b:if>

<div class='widget-content'>
<div class='blog-list-container' expr:id='data:widget.instanceId + &quot;_container&quot;'>
<ul expr:id='data:widget.instanceId + &quot;_blogs&quot;'>
<b:loop values='data:items' var='item'>
<li expr:style='data:item.displayStyle'>
<div class='blog-icon'>
<b:if cond='data:showIcon == &quot;true&quot;'>
<input expr:value='data:item.blogIconUrl' type='hidden'/>
</b:if>
</div>
<div class='blog-content'>
<div class='blog-title'>
<a expr:href='data:item.blogUrl' target='_blank'>
<data:item.blogTitle/></a>
</div>
<div class='item-content'>
<b:if cond='data:showItemThumbnail == &quot;true&quot;'>
<b:if cond='data:item.itemThumbnail'>
<div class='item-thumbnail'>
<a expr:href='data:item.blogUrl' target='_blank'>
<img alt='' border='0' expr:height='data:item.itemThumbnail.height' expr:src='data:item.itemThumbnail.url' expr:width='data:item.itemThumbnail.width'/>
</a>
</div>
</b:if>
</b:if>
<b:if cond='data:showItemTitle == &quot;true&quot;'>
<span class='item-title'>
<b:if cond='data:item.itemUrl != &quot;&quot;'>
<a expr:href='data:item.itemUrl' target='_blank'>
<data:item.itemTitle/></a>
<b:else/>
<data:item.itemTitle/>
</b:if>
</span>
</b:if>
<b:if cond='data:showItemSnippet == &quot;true&quot;'>
<b:if cond='data:showItemTitle == &quot;true&quot;'>
-
</b:if>
<span class='item-snippet'>
<data:item.itemSnippet/>
</span>
</b:if>
<b:if cond='data:showTimePeriodSinceLastUpdate == &quot;true&quot;'>
<div class='item-time'>
<data:item.timePeriodSinceLastUpdate/>
</div>
</b:if>
</div>
</div>
<div style='clear: both;'/>
</li>
</b:loop>
</ul>

<b:if cond='data:numItemsToShow != 0'>
<b:if cond='data:totalItems &gt; data:numItemsToShow'>
<div class='show-option'>
<span expr:id='data:widget.instanceId + &quot;_show-n&quot;' style='display: none;'>
<a href='javascript:void(0)' onclick='return false;'><data:showNText/></a>
</span>
<span expr:id='data:widget.instanceId + &quot;_show-all&quot;' style='margin-left: 5px;'>
<a href='javascript:void(0)' onclick='return false;'><data:showAllText/></a>
</span>
</div>
</b:if>
</b:if>

<b:include name='quickedit'/>
</div>
</div>
</b:includable>
</b:widget>


4.Now add rel='nofollow' to your blogroll widget code as the example below:


<b:widget id='BlogList1' locked='false' title='Blogroll' type='BlogList'>
<b:includable id='main'>
<!-- only display title if it's non-empty -->
<b:if cond='data:title != &quot;&quot;'>
<div id='blog-list-title'>
<h2 class='title'><data:title/></h2>
</div>
</b:if>

<div class='widget-content'>
<div class='blog-list-container' expr:id='data:widget.instanceId + &quot;_container&quot;'>
<ul expr:id='data:widget.instanceId + &quot;_blogs&quot;'>
<b:loop values='data:items' var='item'>
<li expr:style='data:item.displayStyle'>
<div class='blog-icon'>
<b:if cond='data:showIcon == &quot;true&quot;'>
<input expr:value='data:item.blogIconUrl' type='hidden'/>
</b:if>
</div>
<div class='blog-content'>
<div class='blog-title'>
<a expr:href='data:item.blogUrl' rel='nofollow' target='_blank'>
<data:item.blogTitle/></a>
</div>
<div class='item-content'>
<b:if cond='data:showItemThumbnail == &quot;true&quot;'>
<b:if cond='data:item.itemThumbnail'>
<div class='item-thumbnail'>
<a expr:href='data:item.blogUrl' rel='nofollow' target='_blank'>
<img alt='' border='0' expr:height='data:item.itemThumbnail.height' expr:src='data:item.itemThumbnail.url' expr:width='data:item.itemThumbnail.width'/>
</a>
</div>
</b:if>
</b:if>
<b:if cond='data:showItemTitle == &quot;true&quot;'>
<span class='item-title'>
<b:if cond='data:item.itemUrl != &quot;&quot;'>
<a expr:href='data:item.itemUrl' rel='nofollow' target='_blank'>
<data:item.itemTitle/></a>
<b:else/>
<data:item.itemTitle/>
</b:if>
</span>
</b:if>
<b:if cond='data:showItemSnippet == &quot;true&quot;'>
<b:if cond='data:showItemTitle == &quot;true&quot;'>
-
</b:if>
<span class='item-snippet'>
<data:item.itemSnippet/>
</span>
</b:if>
<b:if cond='data:showTimePeriodSinceLastUpdate == &quot;true&quot;'>
<div class='item-time'>
<data:item.timePeriodSinceLastUpdate/>
</div>
</b:if>
</div>
</div>
<div style='clear: both;'/>
</li>
</b:loop>
</ul>

<b:if cond='data:numItemsToShow != 0'>
<b:if cond='data:totalItems &gt; data:numItemsToShow'>
<div class='show-option'>
<span expr:id='data:widget.instanceId + &quot;_show-n&quot;' style='display: none;'>
<a href='javascript:void(0)' onclick='return false;'><data:showNText/></a>
</span>
<span expr:id='data:widget.instanceId + &quot;_show-all&quot;' style='margin-left: 5px;'>
<a href='javascript:void(0)' onclick='return false;'><data:showAllText/></a>
</span>
</div>
</b:if>
</b:if>

<b:include name='quickedit'/>
</div>
</div>
</b:includable>
</b:widget>


5.Now save your template and you are done.

Thursday, February 18, 2010

CSS Horizontal Navigation Menu For Bloggers/Websites


Here tutorial how to make CSS Horizontal Navigation Menu For Bloggers/Websites, follow this simple step :
1.Login to your blogger dashboard--> layout- -> Edit HTML
2.Scroll down to where you see </head> tag
3.Copy below code and paste it just before the </head>tag.


<style type='text/css'>
#foxmenucontainer{
height:29px;
background:url(https://blogger.googleusercontent.com/img/b/R29vZ2xl/AVvXsEg_R94iFysuv3TV5Ckbudu8tFjuS4lYySKPRHdOBT8NVoXOPbIXOeTLBNlqjiZcAGmDpcuLEGZwd-81VXntEa80YKQP71y7e6GewjAPCYxI8HAXuENxF4E-JjxlGzduwA_660cyy-lQBCJI/) repeat-x;
display:block;
padding:0px 0 0px 0px;
border-top:1px solid #474747;
font: 14px &quot;Century gothic&quot;,verdana, Arial, sans-serif;
font-weight:normal;
}

#menu ,#menu ul {
margin: 0px 5px;
padding: 0px;
list-style: none;
height:29px;
}

#menu a {
color: #B3DBEF;
display: block;
font-weight: normal;
padding: 4px 10px 6px 10px;
}

#menu a:hover {
background:url(https://blogger.googleusercontent.com/img/b/R29vZ2xl/AVvXsEi_qMSfz5MamSgKXcx1cpIzwguampiTDu8nPOuCStiiyJYljhK21jtGm3isd12prYmoQeMpzAWKOfLibpTKhSzrJJIHpRw-x0UxGoWOgxdSZMs2tpao-A0_WBz7dR6Cv-oOsqvL7w8DG4Q8/) repeat-x;
color: #fff;
display: block;
text-decoration: none;
}

#menu li {
float: left;
margin: 0px 0 0px 0;
padding: 0px;
}

#menu li li {
float: left;
margin: px 0px 0px 5px;
padding: 0px;
width: 130px;
}

#menu li li a, #menu li li a:link, #menu li li a:visited {
background:url(https://blogger.googleusercontent.com/img/b/R29vZ2xl/AVvXsEg_R94iFysuv3TV5Ckbudu8tFjuS4lYySKPRHdOBT8NVoXOPbIXOeTLBNlqjiZcAGmDpcuLEGZwd-81VXntEa80YKQP71y7e6GewjAPCYxI8HAXuENxF4E-JjxlGzduwA_660cyy-lQBCJI/) repeat-x;
width: 150px;
float: none;
margin: 0px;
padding: 4px 10px 5px 10px;
color:#fff;
}

#menu li li a:hover, #menu li li a:active {
background:url(https://blogger.googleusercontent.com/img/b/R29vZ2xl/AVvXsEi_qMSfz5MamSgKXcx1cpIzwguampiTDu8nPOuCStiiyJYljhK21jtGm3isd12prYmoQeMpzAWKOfLibpTKhSzrJJIHpRw-x0UxGoWOgxdSZMs2tpao-A0_WBz7dR6Cv-oOsqvL7w8DG4Q8/) repeat-x;
width: 150px;
float: none;
margin: 0px;
padding: 4px 10px 5px 10px;
color:#06415F;
}

#menu li ul {
position: absolute;
width: 10em;
left: -999em;
z-index:1;
}

#menu li:hover ul {
left: auto;
display: block;
}

#menu li:hover ul, #menu li.sfhover ul {
left: auto;
}
</style>


Note: Please host menu.jpg and menuhov.jpg images yourself.
4.Now save your template.
5.Go to Layout-->Page Elements and click on "Add a gadget".
6.Select "html/java script" and add the code given below and click save.


<div id="foxmenucontainer">
<div id="menu">

<ul>
<li><a expr:href="data:blog.homepageUrl">Home</a></li>

<li><a href="#" title="#">About</a></li>

<li><a href="#" title="#">WebDesign</a>
<ul>
<li><a href="#" title="#">HTML</a></li>
<li><a href="#" title="#">CSS</a></li>
<li><a href="#" title="#">JavaScript</a></li>
</ul>
</li>

<li><a href="#" title="#">Subscribe</a></li>

<li><a href="#" title="#">Register</a></li>

<li><a href="#" title="#">Contact</a></li>

</ul>
</div>
</div>

Friday, February 5, 2010

Install Fix Ad In Page


Improve your ad on the page. intention to install floating ads appear (which does not stick) on blogs like ads that appear on news sites such as in Indonesia. fathara want to share some tips and tricks that have been practicing fathara

But in this tutorial, fathara want to share the same trick but with a code that is simple and easily changed. The following trick:

# Step One:
- Login to Blogger.
- Go to "Layout" then "Edit HTML".
- Search code ]]></b:skin> then copy and paste the following code above:

.iklan_bawah {background:#fff;position:fixed;bottom:0px;align:bottom; width: 1000px;}

# Step Two:
- Go to "Page Elements".
- Add a gadget and select "HTML / JavaScript".
- Copy paste the following code into it:

<div class="iklan_bawah">

Place ADS CODE HERE YOU

</div>

* Replace align: bottom; to align: top and bottom: 0px to the top: 0px if you want to advertise at the top.
* Replace width and in accordance with the width of your blog.

Friday, January 22, 2010

How to download files from ShareCash


Are you having trouble downloading files from ShareCash? This easy 3-step tutorial will show you how to do it the easy way!

1) When you click on a ShareCash download link, the following page will open:


2) If you click the "Regular Download" button, you will be redirected to a survey page. Just fill in the survey (I would advice you not to fill in your credit card details if asked, in fact, I would say: don't do this ever, period, unless it's absolutely necessary). If you don't want to bother with filling in surveys, you can also choose "Premium Download" to download from ShareCash without any hassle.


3) The next page will show "Click here to continue...". This link will lead you directly to your download!


That's all there is to it, enjoy your download!


Sunday, November 15, 2009

Make Slide Show Tab View menu


tabview Have you ever visited http://kompas.com? One of the most famous newspaper website in Indonesia... At the left of the site, you can see a tab menu which is usually called “Tab View”. Why is it called Tab Menu? Because when the tab is clicked, it will move the menu content (wanna prove, just click the tab). However, it is a little different from the normal tab menu. The tab menu usually shows the content of the menu in turn or what we usually call “slide show”. Kang Rohman takes a conclusion that menu has 2 functions; as a “Tab View” and “Slide Show”.

Kang Rohman was interested in that tab menu, tried to apply it in blogger template and it works. To see the sample of Slide Show Tab View menu, please visit http://magazine-1.blogspot.com and pay attention to the left side of the top, there you can see the menu that is similar to the menu in kompas.com.

If you are interested in making Slide Show Tab View menu, please follow the steps below.

#1 step

1. Log in into blogger with your ID
2. Click Layout
3. Click Edit HTML tab
4. Click Download Full template. Please back up your template first
5. Copy the code below, then paste it above ]]>


.indentmenu{
font: bold 11px Arial;
width: 100%; /*leave this value as is in most cases*/

}

.indentmenu ul{
margin: 2px;
padding: 0;
float: left;
/* width: 80%; width of menu*/
background: transparent;
}

.indentmenu ul li{
display: inline;
}

.indentmenu ul li a{
float: left;
margin: 2px;
color: #000; /*text color*/
padding: 5px 11px;
text-decoration: none;
border: 1px solid #ccc;
}

.indentmenu ul li a:hover{
background:#ddd;
}

.indentmenu ul li a:visited{
color: white;
}

.indentmenu ul li a.selected{
color: white !important;
padding-top: 6px; /*shift text down 1px*/
padding-bottom: 4px;
border: 1px solid #000000;
background:#000000;
}

.tabcontentstyle{ /*style of tab content container*/
border: 1px solid gray;
width: 450px;
margin-bottom: 1em;
padding: 10px;
}

.tabcontent{
display:none;
}

@media print {
.tabcontent {
display:block !important;
}
}

6. Before continuing, please download this script , copy it, then paste it right above </head>
7. Click SAVE TEMPLATE
8. The 1st is done. Now, why don’t you take a rest first, drink coffee, tea or milk to make you relax clip_image001

Ok, finish you coffee, let’s continue to the 2nd step

#2 step

1. Click Page Element tab
2. Click Add Gadget
3.Click plus button (+) for HTML/JavaScript. (img)
4.Copy and paste the code in available column:

<div style="float:left;margin:0px 10px 0px 0px;padding:0px;height:350px;">

<div id="pettabs" class="indentmenu">

<ul>
<li><a href="#" class="selected" rel="tab1">1</a></li>
<li><a href="#" rel="tab2">2</a></li>
<li><a href="#" rel="tab3">3</a></li>
<li><a href="#" rel="tab4">4</a></li>

</ul>
<br style="clear: left"/>
</div>

<div style="width:240px;text-align:justify;padding: 5px; margin-bottom:1em">

<div id="tab1" class="tabcontent">
<a href="http://magazine-1.blogspot.com/2008/11/obama-will-change-bush-policy.html">
<img border="0" style="border-right: 0px; border-top: 0px; border-left: 0px; border-bottom: 0px" alt="obamabush" width="240" src="https://blogger.googleusercontent.com/img/b/R29vZ2xl/AVvXsEjIZpaoUMIUDNZNXym3MaRr_73MvtVCJMRsFECdtpS06bOTWrscTnjrrCoBb3V_HbF_pdxdgMxfQKjAurRwB4ZmO_CJ-YLivABb1MeQ1vaZaKpiuV-hPnDpcssGaMjhVdvEQSmYuzkT6gM/?imgmax=800" height="152" title="obamabush"/></a>

<p><h3><a href="http://magazine-1.blogspot.com/2008/11/obama-will-change-bush-policy.html">Obama Will Change Busf Policy</a></h3></p>
U.S. President Barack Obama will change several numbers of controversial policies by President George W. Bush, including the restriction of the parent embryo cell research [...]
</div>

<div id="tab2" class="tabcontent">
<a href="http://magazine-1.blogspot.com/2008/11/beyonce-will-never-sell-her-wedding.html">
<img border="0" style="border-right: 0px; border-top: 0px; border-left: 0px; border-bottom: 0px" alt="beyone" width="240" src="https://blogger.googleusercontent.com/img/b/R29vZ2xl/AVvXsEildKG8i-PmuCEPt9dhhL34U_8xNlQOhopUor9G9h9pbs67Ur1g8xgOXJHk11Q0NlY1rOjUWG_kFJNLMv7LL7cj0SyGJhNFWJWXvXJKxPMafefnalJiJjttzMr1KGZ1mx36eZE2cHAuutw/?imgmax=800" height="152" title="beyone"/></a>
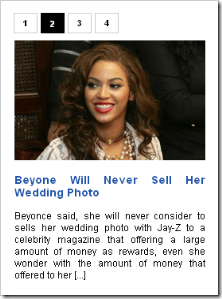
<p><h3><a href="http://magazine-1.blogspot.com/2008/11/beyonce-will-never-sell-her-wedding.html">Beyone Will Never Sell Her Wedding Photo</a></h3></p>

Beyonce said, she will never consider to sells her wedding photo with Jay-Z to a celebrity magazine that offering a large amount of money as rewards, even she wonder with the amount of money that offered to her [...]
</div>

<div id="tab3" class="tabcontent">
<a href="http://magazine-1.blogspot.com/2008/11/guns-n-roses-will-back.html">
<img border="0" style="border-right: 0px; border-top: 0px; border-left: 0px; border-bottom: 0px" alt="Guns N 'Roses" width="240" src="https://blogger.googleusercontent.com/img/b/R29vZ2xl/AVvXsEhM-TrCjYAjcq-OnTupkMQIudZlrkDNA14bVcn3e1o6oqHTDAYYqRsdWdInEWaX-LMkG4Ct4nTBxxDyxcxBzHlMQy23V5Se7I4xTwASzGTrRQkcSygWJLARqkRNDeRYngRzFuM_tbsWGlg/?imgmax=800" height="152" title="Guns N 'Roses"/></a>
<p><h3><a href="http://magazine-1.blogspot.com/2008/11/guns-n-roses-will-back.html">Guns N 'Roses Will Back</a></h3></p>

After 15 years not releasing album, the group rock Guns N ' Roses will launch a new album in the United States on 23 November. The band's latest album is "The Spaghetti Incident", released in 1993 [...]
</div>

<div id="tab4" class="tabcontent">
<a href="http://magazine-1.blogspot.com/2008/11/i-pod-can-make-your-ear-buzz.html">
<img border="0" style="border-right: 0px; border-top: 0px; border-left: 0px; border-bottom: 0px" alt="ipod" width="240" src="https://blogger.googleusercontent.com/img/b/R29vZ2xl/AVvXsEinOVB4XEC0lRXXsdn9RrODLJC3YgS_PbLoweU7qxLyRChZEZX5dxSYAX9PRQUxViGyve2mYkWuFIKH2aywWVYahitjzLrKBsYJTa-CoFXpm4DJqy4QSjy782JAQ-VuhfPUlzfEb2A61Hc/?imgmax=800" height="152" title="ipod"/></a>
<p><h3><a href="http://magazine-1.blogspot.com/2008/11/i-pod-can-make-your-ear-buzz.html">Ipod Can Make Your ear Buzz</a></h3></p>

Music is one way to wake the spirit, to create happy life, but what happens if the music makes the ears buzz? of course, not the music that makes the ear 'buzzy',[...]
</div> </div>

<script type="text/javascript">

var mypets=new ddtabcontent("pettabs")
mypets.setpersist(true)
mypets.setselectedClassTarget("link")
mypets.init(2000)

</script>

5.

Click SAVE TEMPLATE button.
6.

Finish and view you blog to see the result.

The code above is not absolute as Kang Rohman has written. You can modify it as your interest or suitable with your template.

Below is additional information that will ease you in modifying this code.

In the 1st step, there is a row of CSS code, that code can be modified so that it produces a beautiful row tab.

Take a look at the code below


<div style="float:left;margin:0px 10px 0px 0px;padding:0px;height:350px;">

<div id="pettabs" class="indentmenu">

<ul>
<li><a href="#" class="selected" rel="tab1">1</a></li>
<li><a href="#" rel="tab2">2</a></li>
<li><a href="#" rel="tab3">3</a></li>
<li><a href="#" rel="tab4">4</a></li>

</ul>
<br style="clear: left"/>
</div>
This code is a tab row with the tab row such as1, 2, 3, and 4. You can change with your favorite ones, such Recent Comments, Recent Post, Shoutbox or anything you want. To arrange the height of your widget, change height:350px with the value that you want, example; height:400px.

Please, Pay attention the code below too.

<div style="width: 240px; text-align: justify; padding: 5px; margin-bottom: 1em">

The code above is used to arrange the menu content and it can be changed as you want to, such as;

width:240px : it is used to arrange the width, change it with the value that you want, example; width:300px.

text-align:justify : it is used to arrange the writing, change it with the value that you want,

Example; text-align:left, text-align:right.

Also, Pay attention the code below too.

<script type="text/javascript">

var mypets=new ddtabcontent("pettabs")
mypets.setpersist(true)
mypets.setselectedClassTarget("link")
mypets.init(2000)

</script>

To arrange the moving of image from one tab to other tab, change 2000 with the value that you want, example; 2100.

Code in “Slide Show Tab View” contains Kang Rohman Articles. Please change it with your own articles.

Have a nice trying

Thursday, November 12, 2009

3 columns under the header


In this post is just posting random tips and tricks and this from a master of doyok mas. That I will issue a tip and trick how to make a 3 column under the header which I've tried and can berjalanan well on my blog this very simple and just getting destroyed, heheheh! want to know how a simple but useful, follow these steps - these steps:
Enter the code - the HTML code below on this code]]></b:skin> :

#kolom {

width: 960px;

position: relative;

clear: both;

margin: 0px 0 15px -10px;

color: #000000;

float: left;

padding: 0 0;

background: #cccccc;


border-bottom: 2px solid #e6e6e6; }


#kolomkiri {

width: 290px;

float: left;

margin: 0 5px 0 10px;

padding: 5px 15px 5px 10px;

border-right: 1px solid #e6e6e6;

}


#kolomtengah {

width: 290px;

float: left;

margin: 0 5px 0;

padding: 5px 15px 5px 5px;

border-right: 1px solid #e6e6e6;

}


#kolomkanan {

width: 290px;

float: left;

margin: 0 0 0 5px;

padding: 5px;

}


.kolom li {

background:url('https://blogger.googleusercontent.com/img/b/R29vZ2xl/AVvXsEhJEF49BzZ3zPlGuzFbyASKpTwafhu2N8pnVzhtx7R8ryXS-Dk3XH9LyoDF7HDVEaGSl2RyzvIgHY3HUIWYx1xPUlXDcSI87Jr6suX59UNgOnexeDLA2-1Zefj899vW0UGaCoEPUDStPw4/s1600/arrow_icon.png') no-repeat;

list-style-type: none;

margin: 0 0 5px;

padding-left: 20px; }


.kolom ul {

list-style-type: none;

margin: 0;

padding: 0; }


.column ul li {

background:url('https://blogger.googleusercontent.com/img/b/R29vZ2xl/AVvXsEhJEF49BzZ3zPlGuzFbyASKpTwafhu2N8pnVzhtx7R8ryXS-Dk3XH9LyoDF7HDVEaGSl2RyzvIgHY3HUIWYx1xPUlXDcSI87Jr6suX59UNgOnexeDLA2-1Zefj899vW0UGaCoEPUDStPw4/s1600/arrow_icon.png') no-repeat;

list-style-type: none;

margin: 0 0 5px;

padding: 0 0 0 20px;

border-bottom: 1px dashed #e6e6e6; }


.kolom h2 {

background: #cccccc;

color: #000000;

height: 29px;

text-transform: uppercase;

margin: 0 0 10px;

padding: 6px 0 3px 0px;

font: bold 18px Arial, Tahoma, Verdana;

text-align: center; }


then you find the following code<div id='main-wrapper'>


when it met with the code enter the code - the code below the above code

<div id='kolom'>

<b:section class='kolom' id='kolomkiri' preferred='yes' showaddelement='yes'/>

<b:section class='kolom' id='kolomtengah' preferred='yes' showaddelement='yes'/>

<b:section class='kolom' id='kolomkanan' preferred='yes' showaddelement='yes'/>

</div>

Wednesday, November 11, 2009

Make a marquee effect

What is the marquee? Marquee is a HTML code to make an object can moving or walk. Marquee code is a popular code because many blogger using this code at them blog's. Marquee effect can make by using ... tag . However marquee just work if viewed at Internet explorer, if you looking at firefox it's bad looking.

The attribute which almost used is :

BGCOLOR="color" → to manage background color of an object (teks, image, ..etc).

DIRECTION="left/right/up/down" → to manage direction of the moving object .

BEHAVIOR="scroll/slide/alternate" → to manage behavior of the moving object .

Scroll → object moving scroll.

Slide → object moving 1 time and then stop.

Alternate → object moving from left to right and then return again.

TITLE='message" → The title or message will emerge when the computer mouse at the marquee object.

SCROLLMOUNT="number" → to manage the speed of marquee, ever greater of number is faster his speed.

SCROLLDELAY="number" → to manage delay time, it's on second.

LOOP="number|-1|infinite" → to manage sum of looping.

WIDTH="number" → to manage width of marquee object, it's on pixel (px) or persen (%).

So that clearer I will show the example :

The example of marquee from direction :

<marquee align="center" direction="left" height="200" scrollamount="2" width="100%">

this is example of marquee, the text moving from rigt to the left

</marquee>

the result :

this is example of marquee, the text moving from rigt to the left


Change the word "left" with other word what you want, there is : right, up, down.

The example of marquee from behavior :
<marquee align="center" direction="left" height="200" scrollamount="4" width="100%" behavior="alternate">

this is example of marquee from behavior

</marquee>

The result :
this is example of marquee from behavior

The example from marquee of text variation with background color.
<div align="left"><font face="georgia" color="White"><B><marquee bgcolor="red" width="100%" scrollamount="3" behavior="alternate">
The example of marquee of text variation with background color.

</marquee></b></font></div>

The result :

The example of marquee of text variation with background color.


There is differ various from marquee, namely when computer mouse is reside in the marquee area the object will stop and when computer mouse in re-shifting to the other place the object will moving again. To make this effect only adding a few code at the marquee code.

For example, Please drop your computer mouse to the marquee area :

<marquee onmouseover="this.stop()" onmouseout="this.start()" scrollamount="2" direction="up" width="100%" height="200" align="center">

Please drop your computer mouse to here and you will be see the effect

</marquee>


The result :

Please drop your computer mouse to here and you will be see the effect

The example of marquee with links object :

<marquee onmouseover="this.stop()" onmouseout="this.start()" scrollamount="2" direction="up" width="100%" height="100" align="center">

<a href="http://rubrik-elektronik.blogspot.com" target="new">Rubrik Elektronik</a><br />

<a href="http://kolom-tutorial.blogspot.com" target="new">Blog kang Rohman </a><br />

<a href="http://template-unik.blogspot.com" target="new">UniQue Template </a><br />

<a href="http://css-lybrary.blogspot.com" target="new">CSS Library </a><br />


The result :


Rubrik Elektronik

Blog kang Rohman

UniQue Template

CSS Library


Perhaps only that for example, please creat other various of marquee effect with your self. See you at may next post. Happy blogging!

Make a Drop Down Menu With Same Width

Hi every body ! meet you again at my new tutorial. Several weeks ago, I'm ever posting about How to make a drop down menu at this post. One of my reader ask to me, it's the question :

Hi Rohman,

Thanx for the piece of code! Now I have a set of drop down menus on my blog. But I have one query... Is there any way I could have them all of the same width? It kinda looks ugly to have different sizes for each drop down menu... Thanx in advance!


Allright, i will give you an example :


Is there looks ugly for you? don't worry, you can make a drop down menu with same width. Only add a little code, your menu will looks with same width. it's the code :

style="width:200px"


200px is value of width, you can change this number with other value, maybe 150px, 220px, or other value.

Now, i will give you an example. this is my previous code :
<form><select name="menu" onchange="window.open(this.options[this.selectedIndex].value,'_blank')" size="1">

<option> - Blog Tutorial - </option>

<!-- change the links with your own -->

<option value="http://rohman-freeblogtemplate.blogspot.com/2007/11/strart-to-blogging.html">Start to blogging</option>

<option value="http://rohman-freeblogtemplate.blogspot.com/2007/11/how-to-settings-your-blog.html">Blog setting</option>

</select></form>

<form><select name="menu" onchange="window.open(this.options[this.selectedIndex].value,'_blank')" size="1">

<option> - Blogspot Tutorial - </option>

<!-- change the links with your own -->

<option value="http://rohman-freeblogtemplate.blogspot.com/2007/11/strart-to-blogging.html">Start to blogging</option>

<option value="http://rohman-freeblogtemplate.blogspot.com/2007/11/how-to-settings-your-blog.html">How to seeting </option>

</select></form>

the results :


And this is the code with : style="width:200px" :

<form><select name="menu" onchange="window.open(this.options[this.selectedIndex].value,'_blank')" size="1" style="width:200px">

<option> - Blog Tutorial - </option>

<!-- change the links with your own -->

<option value="http://rohman-freeblogtemplate.blogspot.com/2007/11/strart-to-blogging.html">Start to blogging</option>

<option value="http://rohman-freeblogtemplate.blogspot.com/2007/11/how-to-settings-your-blog.html">Blog setting</option>

</select></form>

<form><select name="menu" onchange="window.open(this.options[this.selectedIndex].value,'_blank')" size="1" style="width:200px">

<option> - Blogspot Tutorial - </option>

<!-- change the links with your own -->

<option value="http://rohman-freeblogtemplate.blogspot.com/2007/11/strart-to-blogging.html">Start to blogging</option>

<option value="http://rohman-freeblogtemplate.blogspot.com/2007/11/how-to-settings-your-blog.html">How to seeting </option>

</select></form>

the results :


What dou you think about this? looks prety?


Except same width, with style you can manage the other function such as the color of alphabet, background of your menu, and etc.

for example :

style="width:200px;color:#ff0000;background:#B2DDFB"


#ff0000, #B2DDFB is the code of color, you can change this code with your color code.

this is the example of drop down menu with color and background color :


the results :


Hmmmm.. how do think about this menu?

If you feel enjoy this post please Digg It!

I think enought for today, see you at my next tutorial. Happy blogging.
Support me on SEO Contest Kampanye Damai Pemilu Indonesia 2009 Kampanye Damai Pemilu Indonesia 2009

Sunday, November 8, 2009

How To Set Up Google AdSense Video Units Via YouTube

Yesterday I wrote about the launch of Google AdSense video units, but like I said, no one with an AdSense account was able to use the feature yet. As of last night that changed.

Here is a how to, on setting up Google AdSense Video Units via YouTube.

Step 1: Go to your AdSense Set Up Page and click on the YouTube (Video Units) option as pointed out in the image below:

Setting Up Google AdSense Video (YouTube) Ads

Step 2: Agree to legal disclaimer (first time only):

Setting Up Google AdSense Video (YouTube) Ads

Step 3: Confirm your AdSense account with YouTube (first time only). You are taken to YouTube after you agree to the disclaimer. This is where you plugin your AdSense account information, so YouTube and AdSense can communicate.

Setting Up Google AdSense Video (YouTube) Ads

Step 4: When that is done, it should tell you they have associated your account with YouTube.

Setting Up Google AdSense Video (YouTube) Ads

Step 5: Then you set up your first player. You define the player name and description, the layout and the colors also.

Setting Up Google AdSense Video (YouTube) Ads

Step 6: Define the content matching options. You can let Google figure out your content and provide relevant video ads, or you can help with hints or by specifying the content you want on your site.

Setting Up Google AdSense Video (YouTube) Ads

Step 7:Then you just click the generate ad code:

Setting Up Google AdSense Video (YouTube) Ads

Paste the code into your page, like I did here below and you should see an add related to search stuff.

The next time you go to your Google AdSense set up page and click on video units, you will be taken to a page that shows you your old units and gives you the ability to create new ones or remove old ones.

Setting Up Google AdSense Video (YouTube) Ads

That pretty much is the detailed walk through of how to set up Google AdSense Video Units for the first time.


Tuesday, November 3, 2009

Tips To Delete the Image Border

Hello, Friends, when do you often insert an image, when you are posting in your blog?, like this .

Sometimes we feel bother with the border of the image, for example


or


If you want to delete the border of the image, you can follow the following instruction.

  1. Login into blogger with your account
  2. Click Layout
  3. Click Edit HTML tab
  4. Click Download full template, and please backup your template first
  5. Find the similar code below in your template.


    .post img {
    padding:4px;
    border:1px solid $bordercolor;
    }

  6. Delete this code line

    border:1px solid $bordercolor;
  7. Click Save template
  8. Finish

It is easy, isn’t? Now if you insert smile in your posting, trust me that there won’t be any image border again.

See you in my next posting


Tips to Make Multi Column on Blogger Template

Hi guys? Meet again with me on Blogspot tutorial. This time, I would like to share my trick and tips to make multi column on blogger template. Like in wordpress, maybe you ever see any footer column which split into 2, 3, or even 4 parts. The question is, “do we can make the same thing in Blogger?” Of course we do. It will be very easy to build. Do you want to know more? Read it till end!

To make footer part become one column, it isn’t difficult as you imagine. But, you need a little trick to make the footer blog have multi column. To make you understand, I advise you to try it. Make a new blog for this little experiment (don’t do it on your main blog). In order to avoid any accident that might be happen..

First preparation that we need to give attention most is, width of our column that will be split into multi column, quantity of column that we going to make, space between one column to another column. But, templates in Blogger are so much. To make a deal with those problems, let’s use template Minima. Minima is original template that provide by Blogger with optional color white. Number of column that we are going to make is three column.

Original Minima template has 660 pixel column widths. We are going to make three columns, if we calculate it : 660px divide by 3 = 220px. With space (code to make space is padding) between column is 10px. Based on result of my calculation, column that we will make is 205px.

This is the steps to make multi column on blogger template :

Step 1:

  1. Don’t give a tick on white little box beside sentence, “expand widget template”. Or it will be twice more difficult.
  2. Add the code below exactly above code ]]>

    /* bottom
    ==================== */

    #bottom {
    width: 660px;
    position: relative;
    clear:both;
    margin: 0 auto;
    color:#fff;
    float: left;
    background:#BDBABD;
    padding: 15px 0 15px 0;
    }

    #bottom h2 {
    padding: 5px 0 2px 0;
    margin: 0 0 10px 0;
    color:#ff5a00;
    font-size: 24px;
    letter-spacing: -1px;
    border-bottom: 1px solid #fff;
    }

    #bottom ul {
    padding: 0;
    margin: 0;
    }

    #bottom ul li {
    line-height: 26px;
    list-style-type: none;
    border-bottom: 1px dashed #031c5d;
    }

    #bottom ul li a {
    display: block;
    padding: 0 10px;
    color:#0701FD;
    text-decoration: none;

    }
    #bottom ul li a:hover {
    background: #B1ACB1;
    }

    #left-bottom {
    width: 205px;
    float: left;
    padding-left:10px;
    }

    #center-bottom {
    width: 205px;
    float: left;
    padding-left:10px;
    }

    #right-bottom {
    width: 205px;
    float: left;
    padding: 0 5px 0 10px;
    }

  3. Head to body under part of template code. Find out codes like this:


  4. Copy and paste code below exactly above of the previous code.

  5. Click Save Template Buttons.

  6. It’s done!

Step 2:

  1. Click Page Element tab.
  2. Are your new columns already become three?

bottom-page

If it hasn’t success yet, you must be missing something. If you already success, congratulations on you.

Well… do you want to see the examples? Just click here! Or, you can see at the bottom of this page.

Good luck!

PhotoShop Tutorial – basic technique of slicing

I do believe that you have already known about software that can manage the picture called Photoshop. With Photoshop, we can create an interesting picture easily, you can also edit the original picture (e.g. Photo) into a different pictures or your favorite and interest one.

If you like a blog design or web design, you should be able to operate Photoshop. One of technique that relates a lot with blog or web design is slicing technique.

Slicing is a technique to divide or cut a picture into some parts and has different size and format. The slicing technique is often used to make the pictures not heavy when the blog is loading. Example. See the sample picture (1) below:

The sample picture above is often used as background of sidebar title. Do you know that to show the background the sample above, you don’t have to show the whole picture but only cut them into small pieces so that when the blog is loading, it will not be heavy. You only need a small picture as seen below:

The technique to show the picture is by using Code:


background:url("image_URL”) repeat-x;

Repeat-x is a technique to show the pictures repeatedly in horizontal form (x - axis). So, even though the picture is only a small piece, the picture will seem full to the sides as seen in picture one above;

The picture above is usually used as a blog or web background (in big size). In order not to make the picture burden or weigh the loading, the picture needs to be cut as the pictures below;


The technique to show the picture is by using Code:

Background: URL ("image_URL”) repeat-y;


repeat-y is a technique to show the picture repeatedly in vertical way (y-axis). Even though, the picture is only a small piece; the picture will look full vertically as see in the picture 2 above.

This post will not discuss deeper about repeat-x or repeat-y picture because it will focus on basic technique of slicing in Photoshop.


Ok, now open your Photoshop, and then make a new file.


Choose the image size 640 x 480 (sample only)


Make a new layer, click: Layer » New » Layer…

Or simply click the icon of right bottom of create New layer (usually located the screen)

Click icon off add a layer style, then choose gradient overlay…

Setting angle into 0 (zero), then click on the sample gradient picture:

Choose the yellow gradient (sample only), and then the result will look like below;

Now, we do the slicing; choose Slice Tool (space + k)

Drop into the angles of the pictures you want to cut, click and hold, then drop into the area you want to cut. Stop holding it or releasing the hold on the pictures you want. Do the same things for the other picture area you want.

Click file, then Save for Web… to save your picture.

Choose tab 4-Up and choose the image picture and the quality you want. Then Save to end it.

Well, I guest that’s all about basic technique of slicing.


Free PageRank Checker